

HELP
CUSTOMER INFORMATION
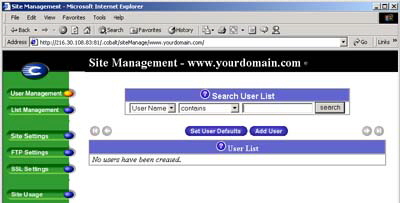
1. Go to yourdomain.com/siteadmin and sign in using your username and password. The screen should look like the one to the right.
Adding a site user
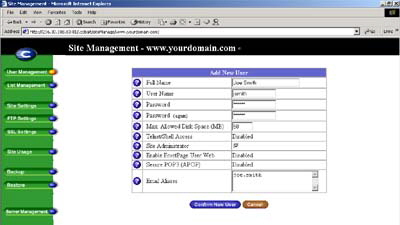
2. Click the Add User button at the top of the page.
4. Click Confirm New User.

Removing a site user
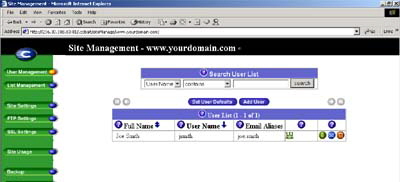
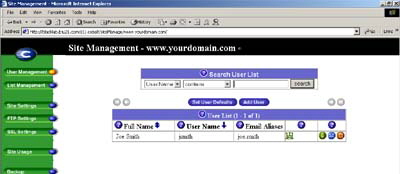
1. While on the Site Management screen, click the green wrench icon next to the virtual site to which the user belongs. The User Management table appears.
2. In the User Management table, locate the site user that you want to remove.
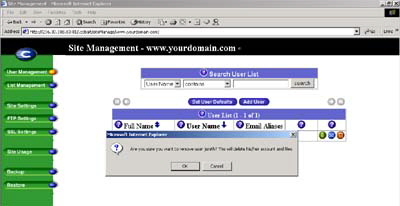
3. Click the brown trashcan icon next to the site user. A confirmation dialog box appears.
4. Click OK to delete the site user’s account and files.
Modify settings for a site user
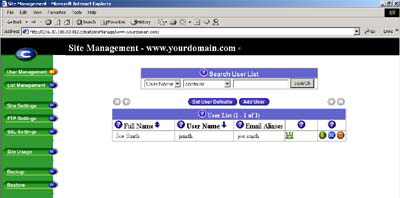
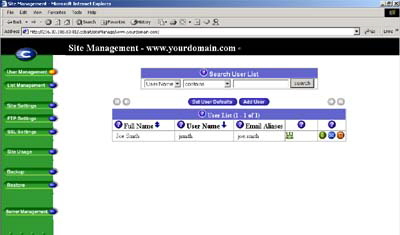
1. On the Site Management screen, click User Management.
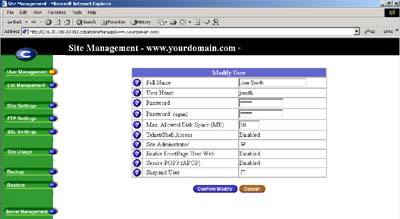
2. Click the green pencil icon for the site user. The Modify User table appears.
3. Enter the changes in the Modify User Table.
4. Click Confirm Modify.
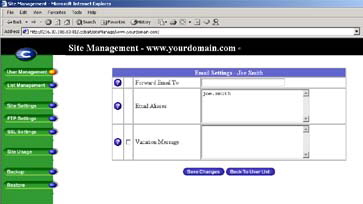
Modify email options for a site user
2. Click the blue envelope icon for the site user. The Modify User table appears.
3. Enter the changes in the Modify User table.
To add an email alias, enter the additional names that the user will receive email as in the Email Aliases field.
DO NOT add the domain name to the additional names. Since the site user is part of the virtual site, he or she automatically inherits the domain name of the virtual site. If you do add the domain name in the Email Aliases field, the software gets confused.
4. Click Save Changes.
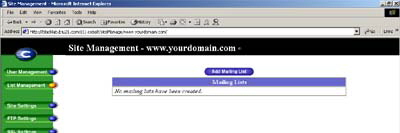
Adding a mailing list
1. On the Site Management screen, click List Management. The Mailing List table appears.
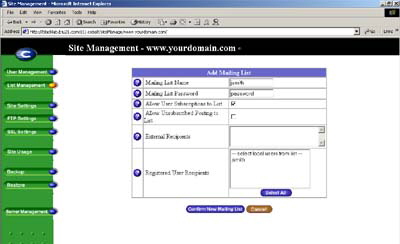
6. Add recipients to the mailing list:
- To add external recipients to the mailing list, enter the email addresses in the “External Recipients? field.
- To include existing registered site users in the list, click the username in the scrolling window.
To select all the registered site users, click Select All.
To select individual recipients in the scrolling window, hold down the Control Key (Windows) or the Apple Key (Macintosh) and click on the user names.
7. Click Confirm New Mailing List.
3. Enter the information for the site userl
Enter the site user’s name and password, set the allocation of total disk space for the user, enable telnet/shell access (if appropriate), make them a Site Administrator (if appropriate), enable FrontPage user Web (if appropriate) and enable Secure POP3 (APOP) (if appropriate).
2. Click Add Mailing List. The Add Mailing List table appears.
3. Enter a name for the mailing list.
4. Enter a password for the mailing list. You need the password for managing the mailing list.
5. To accept email addressed to the mailing list from an email address that is not a member of the list, click the check box next to Allow mail from unsubscribed addresses.
|
|
|
|
BLACK LAB | INTERNET
A Webcore Technologies, Inc. Company
COPYRIGHT 2004 BLACK LAB INTERNET ALL RIGHTS RESERVED